Table of Content
In the “Discovery” section, I kept the Explicit Invocation as “Default Welcome Intent” and the Implicit Invocation as “ActOnLED” and enable “Auto-preview changes”. Once the function has been created, in the next screen, in the “Designer” section, add “API Gateway” as the trigger. Setting up the DialogFlow agents to work with any Google Assistant devices under your Google account. The ESP32 is a cheap Wi-Fi module which perfectly suited for DIY projects in the Internet of Things . I may earn a small commission for my endorsement, recommendation, testimonial, and/or link to any products or services from this website. Please do share your feedback on this IoT project.
(In our case “switch all lights on” and “OK. I will switch all lights on. Watch out!”). Then press “create trigger” and in the next screen press “THAT”. Then choose Adafruit and click on “send data to adafruit IO”. The ON-OFF feed appears in the first field and then enter the desired code in the second field (here as an example “all-on”). Create an account at Go to “explore” and then choose “make your own applets from scratch”.
Controlling Arduino from Google Home: Part 1 - Connecting Arduino Uno Wifi Rev 2 to AWS IOT using Mosquitto bridge
And since the IFTTT platform can’t be directly connected to the ESP32, we use another interface called Adafruit-IO to establish a communication between the IFTTT and ESP32. To establish the connection, you can’t just connect the Google Assistant to the microcontroller directly. We need to use two interfaces to establish the connection between the Google Assistant and the ESP32. One for connecting to the Google Assistant and the other for connecting to the ESP32. Once all of these have been set up, comes the moment of truth.

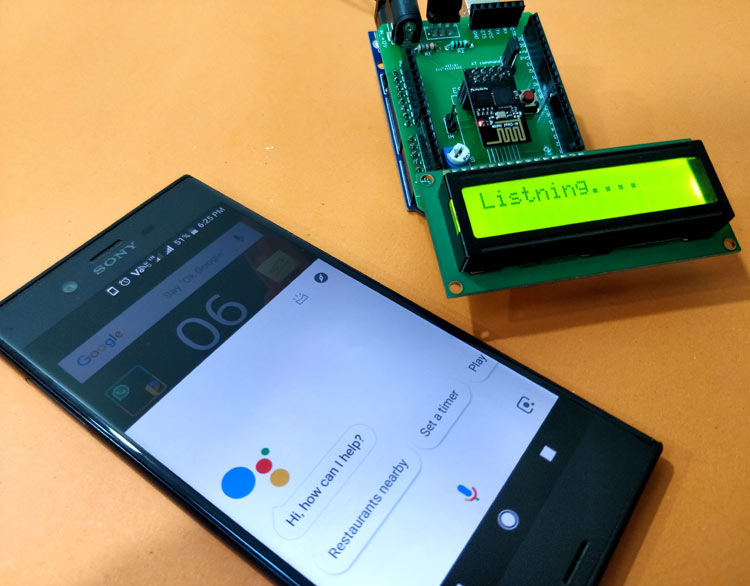
Unlike the company’s previous virtual assistant, Google Now, the Google Assistant can engage in two-way conversations. It can recognize your words better than any devices and respond fast and correctly to your commands. Users primarily interact with the Google Assistant through natural voice, though keyboard input is also supported. Finally, we control the LED with some predefined voice commands. The steps explained in this article can be repeated for controlling different microcontrollers or different electrical devices.
RGB LED - common anode
You'll be prompted to go to your device's Wi-Fi settings and connect to the Google Home hotspot in the network list. Look for the name you previously gave your device during setup. I have already explained, how to set up and add devices to Sinric Pro in following article. The circuit is very simple, I have used D23, D22, D21 & D19 GPIO to control the 4-channel relay module. All I have to do is when we tell google assistant that I’m busy, the led color changes to red and when we tell itthat i’m available now, the led color changes to green.
Then choose the first option "say a simple phrase". Then enter the desired command description and the answer to be given. Download it from the Playstore on your Android phone and install the app. Understanding your own voice commands with Google Home only works with the English language.
Step 2: Programming the Arduino MKR1000
As already mentioned, we need to use a platform called Adafruit-IO to connect the ESP32 to IFTTT. In this step, we are going to connect the ESP32 to Adafruit-IO. Adafruit-IO is actually a cloud storage space that you can connect to through internet. You can use it to connect to a microcontroller like an ESP32 and control its pins. You can actually use it to communicate with any microcontroller in an internet cloud space. We use the IFTTT platform to communicate with Google Assistant.

Say out loud the voice commands that you have entered the “IFTTT” website and see how the LED status changes. You can see the LED turning on and off in the video below. It is a software platform in which different applications, devices and services can be connected to each other to create one or several automations. In fact, the IFTTT acts as a communication interface between them.
connecting ws2812b strips to google home ?
As of 2015, IFTTT users created about 20 million recipes each day. All of the functionalities of the Do suite of apps have since been integrated into a redesigned IFTTT app. The Google Assistant is an artificial intelligence-powered virtual assistant developed by Google that is primarily available on mobile and smart home devices.

You can use Arduino IDE to compile both codes and Upload them to the boards. To switch domestic appliances, you must connect switching relays to the ports of the Arduino MKR1000 instead of the test LEDs. Use 1.5 mm2 wiring at the main voltage supply side to connect the appliances and the relay contacts in a safe way. Then you can go to the “Simulator” and test your app out. Once you’re done testing, your app should be available on Google Assistant on all the connected devices under your Google account.
Then, you’ll be able to speak to the microcontroller and send your voice commands for controlling electrical devices. You can use a relay module to connect the microcontroller to various electrical devices of your house such as light bulbs, fans, cooling system and so on and control them remotely. Control Relays with Google HomeControl Relays with Google AssistantYou can also ask Google Assistant, to control the light [“Hey Google, Turn ON the Room Light“].

As I mentioned earlier, the last step and this were the most confusing steps in the whole project. So please be prepared to do some trial and error and debugging and hitting some unexplained errors along the way. The users can communicate with the Google Assistant with their natural voice, although it also supports the keyboard.
In the text field enter "testTopic" and in the message section delete everything and enter either "off" or "on". If we have set up everything correctly, in a couple of seconds, the Arduino serial monitor should display the same message and the LED should follow whatever direction has been passed. In this section I will explain the simple circuit that I created and the Arduino sketch for this project. How to make a connection between an internet service and Arduino boards. 5 Main wiring (1.5 sqmm) and sockets for a safe connection of the lights and other appliances.


No comments:
Post a Comment